
Side Dishes
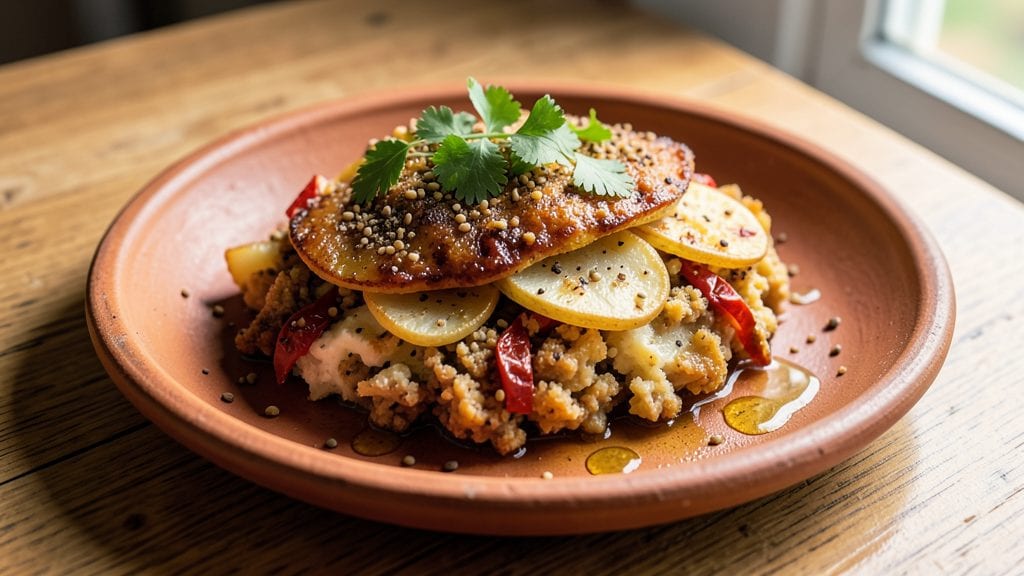
This potato bhaji recipe delivers the perfect balance of crispy edges and herby, spiced centers that make it a beloved street food staple across India. The secret lies in the chickpea flour batter, which creates that signature golden crust while keeping the interior tender and packed with warm spices.
I first discovered bhaji in Mumbai's bustling lanes, where vendors served these spiced potato bites with tangy chutney—now I recreate that same magic in my kitchen.
The beauty of bhaji is its simplicity combined with bold flavors. You'll start with boiled potatoes mashed to the perfect consistency, then bind them with chickpea flour, turmeric, and a blend of cumin, coriander, and chili for that authentic depth.
The mixture is shaped into small patties and fried until crispy, resulting in a dish that's both satisfying and versatile enough to serve as a snack, appetizer, or even a side to grilled meats.
What makes this recipe special is how the spices develop during frying—cumin blooms aromatic, turmeric adds golden hue, and red chili brings just the right kick.
The result is a dish that's crispy on the outside with a soft, spiced interior, perfect for dipping in mint chutney or cooling yogurt sauce. Each bite delivers layers of flavor that transport you straight to the streets of Mumbai.
While Mumbai-style bhaji often includes onions and green chilies, Parsi-style versions sometimes add herbs like parsley or cilantro for extra freshness. This recipe keeps the classic approach but lets you customize the spice level to your preference.
Ready to make bhaji that rivals your favorite street vendor? Let's get started with the ingredients.
Ingredients for potato bhaji
Crispy edges, spiced centers—just 13 ingredients transform boiled potatoes into Mumbai street magic.
| Ingredient | Amount | Notes |
|---|---|---|
| Russet Potatoes 🥔 | 2 lb | Boiled until tender, peeled |
| Chickpea Flour 🌾 | ½ cup | Also called besan, key for crispy texture |
| Ground Cumin Seeds 🌿 | 1 tbsp | Freshly ground for aromatic depth |
| Ground Coriander 🌿 | 1 tbsp | Citrusy warmth essential for bhaji |
| Turmeric Powder 🧂 | ½ tsp | Golden hue and earthy flavor |
| Red Chili Powder 🌶️ | ½ tsp | Adjust for heat preference |
| Garam Masala 🌶️ | ½ tsp | Warm spice blend for depth |
| Fresh Cilantro 🌿 | ¼ cup | Chopped, for herby freshness |
| Green Chilies 🌶️ | 2 whole | Finely chopped, optional for heat |
| Small Onion 🧅 | 1 whole | Finely chopped, for sweetness |
| Vegetable Oil 🫒 | 2 cups | High smoke point preferred |
| Salt 🧂 | ½ tsp | Adjust to taste |
| Lemon Juice 🍋 | 1 tbsp | Freshly squeezed for tang |
The chickpea flour is non-negotiable—it’s what gives bhaji that signature crispy crust. Whole Foods or Indian grocery stores carry the best quality, but any brand works if labeled as 100% chickpea flour (no fillers). Freshly ground cumin and coriander make all the difference—toast the whole seeds in a dry pan for 30 seconds before grinding to wake up their flavors. For garam masala, MDH or Everest brands are widely available and deliver that authentic warmth. The cilantro should be bright green with no wilting—if it looks sad, give it a quick soak in ice water to revive it.
No fresh green chilies? Cayenne pepper at half the amount works in a pinch, but you’ll lose that fresh, grassy kick. Skip the onion if you prefer? Extra tomato paste (1 tbsp) adds sweetness—just stir it into the mashed potatoes. The lemon juice is crucial for that tangy balance, but if you’re out, a splash of vinegar (1 tsp) plus extra salt gets you close. For extra crispiness, add 1 tbsp cornstarch to the batter mix. And if you’re feeling adventurous, swap half the chickpea flour for gram flour (besan) for a nuttier taste.
Bhaji reheats beautifully—just pop them in a 350°F oven for 5-7 minutes to restore crispiness. Store leftovers in an airtight container for 3-4 days, though they’re best enjoyed fresh. Freeze extras by arranging them on a tray first (to prevent sticking), then transfer to a bag for up to 3 months. Pro tip: Serve with mint chutney or yogurt sauce—trust me, it’s a game-changer.
Why You'll Love This Recipe
- No-Fuss Base: I swear by this recipe when I’m too tired to fuss. Russet potatoes and chickpea flour handle all the heavy lifting—just boil, mash, and mix. The ground spices blend in like magic, no measuring cups required.
- Crispy-Creamy Magic: That golden crust from the chickpea flour? It’s the star. Inside stays tender, outside gets addictively crispy—like a cross between a pancake and a fritter. The cumin and coriander? Earthy, warm, and impossible to resist.
- Weeknight to Party: I make this for lazy dinners and impress guests. Serve it with yogurt and chutney for a quick lunch, or pile it high for a festive snack. The turmeric gives it that vibrant color—no one will guess it’s basically a potato hug.
- Budget Hero: A single bag of russets and a jar of spices stretch for weeks. Leftovers reheat like a dream (pan-fry them for extra crunch). Honestly, it’s the kind of dish that makes grocery bills feel lighter.
Step-by-step instructions for potato bhaji recipe
Here's how to transform humble potatoes into irresistibly crispy, spiced bites with that perfect herby crunch.
👨🍳 Step 1: Boil and Mash the Potatoes
Start by peeling the 2 lb russet potatoes and cutting them into even chunks. Place them in a pot of cold water with the 0.5 tsp salt and bring to a boil. Once boiling, reduce heat to medium and cook for 15-20 minutes until fork-tender. Drain thoroughly and let them cool slightly.
While still warm, mash the potatoes until completely smooth—no lumps allowed. This texture is crucial for that perfect crispy exterior. I like to use a potato ricer for ultra-smooth results, but a fork works too. Let the mash cool completely before moving to the next step. Real talk: if you skip this cooling step, your bhaji will absorb too much oil and turn greasy instead of crispy.
👨🍳 Step 2: Create the Spice and Flour Coating
In a large bowl, combine the 0.5 cup chickpea flour, 1 tbsp ground cumin seeds, 1 tbsp ground coriander, 0.5 tsp turmeric powder, 0.5 tsp red chili powder, and 0.5 tsp garam masala. Mix these dry ingredients thoroughly—the aromatic spices are what make bhaji sing. Add the cooled potato mash and mix until completely incorporated.
Now fold in the finely chopped small onion, 2 whole green chilies (chopped), and 0.25 cup fresh cilantro. The fresh herbs add that bright, herby depth that balances the warm spices. Mix gently—overworking will make the bhaji dense instead of light and airy. Here's the thing—if you're sensitive to heat, reduce the chili powder to 0.25 tsp now.
🔥 Step 3: Shape and Fry to Golden Perfection
Heat 1 cup of vegetable oil in a deep skillet over medium heat until it reaches 350°F. This is where the magic happens—keeping the oil at the right temperature ensures crispy bhaji without burning. Shape the spiced potato mixture into small, flat patties about 1-inch thick. I like to make them slightly larger than the serving size so they crisp up nicely.
Fry the bhaji in batches, being careful not to overcrowd the pan. Cook for 3-4 minutes per side until golden brown and crispy. The edges should be deep golden, almost caramelized, while the centers remain warm through. Don't walk away—if the oil gets too hot, the outside will burn before the inside cooks through. Transfer to a paper towel-lined plate to drain excess oil.
🍳 Step 4: Finish with Zesty Tang
While the bhaji is still hot, drizzle with 1 tbsp freshly squeezed lemon juice. This bright acidity cuts through the richness of the oil and spices, balancing the flavors perfectly. Toss gently to distribute the lemon juice evenly. The bhaji should be warm but not sizzling when you serve them—this ensures that crispy texture stays intact.
Here's the moment that matters: serve immediately while they're still crispy. If you need to hold them for a few minutes, keep them warm in a 200°F oven on a wire rack (not a plate—this prevents sogginess). The contrast of crispy outside with warm, spiced centers is what makes bhaji so addictive. For extra serving flair, sprinkle with additional fresh cilantro and serve with mint chutney or tamarind sauce.
Pro Tips For Making Potato Bhaji
- Boil Potatoes Halfway: Cut Russets into even 1-inch chunks, then boil them for 8–10 minutes until just fork-tender—not mushy. Overcooking turns them to glue; undercooking means a dense, unyielding bhaji. Drain and let them cool slightly before mashing—this keeps the texture firm and crispy when fried.
- Toast Chickpea Flour First: Heat 1 tablespoon oil in the pan, then dry-toast the chickpea flour for 2–3 minutes until it smells nutty and darkens slightly. This removes the raw flour taste and prevents a chalky aftertaste. Skip this, and your bhaji will taste like a bland pancake.
- Press, Don’t Pack: When shaping the bhaji patties, press the mashed potato-chickpea mix firmly but don’t squeeze like you’re making a hockey puck. Too much pressure = dense, rubbery centers. Aim for a sturdy but airy texture—like a thick pancake, not a brick.
- Fry in Batches: Crowd the pan, and the oil temperature drops, leading to greasy, soggy bhaji. Fry 2–3 patties at a time over medium-high heat, and move them around like a lazy herder—no flipping needed. Golden and crispy takes 3–4 minutes per side; impatient frying = sad, limp results.
Pro cooking tips for perfect results
Spice Toasting
Freshly toasting your whole spices before grinding unlocks their full aromatic potential. Heat 1 tbsp cumin seeds and 1 tbsp coriander seeds in a dry skillet over medium heat for 30-45 seconds until fragrant and slightly darkened. Immediately transfer to a spice grinder or mortar and pound until finely ground.
This simple step intensifies the earthy, citrusy notes that define bhaji's flavor profile. I always do this right before mixing with the potatoes to preserve the aroma. 🌿
Potato Texture
The secret to perfect bhaji lies in achieving the right potato consistency—smooth but not gluey. After boiling, mash the potatoes until completely lump-free using a potato ricer or fine-mesh strainer. If using a fork, press aggressively to eliminate any resistance.
Let the mash cool completely before mixing with spices, as warm potatoes will absorb too much oil during frying. I've ruined batches by skipping this cooling step—trust me, your bhaji will thank you. 🥔
Oil Temperature
Precise oil temperature control is non-negotiable for crispy bhaji. Use a deep skillet and maintain oil at 350°F using a thermometer—I recommend the Thermoworks Thermapen for accuracy. Test with a small piece of potato batter: if it sizzles and floats immediately, your oil is ready.
Overcrowding the pan will drop the temperature, leading to greasy rather than crispy results. Fry in batches of 2-3 bhaji at a time for optimal crispiness. 🔥
Shaping Technique
Shape your bhaji into slightly irregular patties—don't worry about perfect circles. Press the mixture gently into 1-inch thick shapes using your hands, leaving visible texture on the surface. This irregular shape helps create more crispy edges.
I like to make them slightly larger than serving size so they crisp up nicely during frying. For extra stability, chill the shaped bhaji in the fridge for 15 minutes before frying if your kitchen gets warm. This prevents them from spreading too much in the oil. ✨
Lemon Finish
The final lemon juice drizzle is what elevates bhaji from good to extraordinary. Use freshly squeezed lemon juice—bottled won't cut through the richness as effectively. Add the 1 tbsp lemon juice while the bhaji are still hot, then toss gently to distribute evenly.
This bright acidity balances the warm spices and oil, creating that perfect flavor harmony. For extra zing, add a pinch of salt and black pepper at this stage. 🍋
Reheating Secrets
Bhaji loses crispiness quickly when reheated, but these tricks restore that golden crunch. For oven reheating, spread bhaji on a wire rack set over a baking sheet and bake at 375°F for 5-7 minutes until crispy again.
For air fryer reheating, use 375°F for 3-4 minutes—shake the basket halfway through for even crispiness. Never microwave bhaji unless you want sad, soggy results. The key is high heat and quick cooking time to restore that perfect texture. 💡
Nutrition facts
Frequently asked questions
Can I make potato bhaji without chickpea flour?
Chickpea flour is essential for that signature crispy texture, but you can substitute with 0.5 cup cornstarch mixed with 0.25 cup all-purpose flour. The result won't be as golden or crispy, but it'll still hold together. For a closer texture, try gram flour (besan) if available—it's the traditional choice and adds a nuttier depth.
Why did my bhaji turn out greasy instead of crispy?
Greasy bhaji usually means the oil was too cool or the potatoes weren't properly cooled before mixing. Always maintain oil at 350°F and let the potato mash cool completely—warm potatoes absorb excess oil. Another culprit? Overcrowding the pan—fry in batches of 2-3 for even browning. For extra crispiness, chill shaped bhaji for 15 minutes before frying.
What's the best way to store leftover bhaji?
Store in an airtight container for 3-4 days at room temperature, but reheat properly to restore crispiness. For longer storage, freeze shaped bhaji on a tray first (to prevent sticking), then transfer to a bag for up to 3 months. To reheat: oven at 375°F for 5-7 minutes on a wire rack, or air fryer at 375°F for 3-4 minutes. Never microwave—it'll turn soggy!
Can I bake bhaji instead of frying?
Yes, but the texture will be different—more cake-like than crispy. Brush shaped bhaji with oil and bake at 400°F for 20-25 minutes until golden. For extra crunch, broil for 2-3 minutes at the end. Add 1 tbsp cornstarch to the batter to help with crispiness. Baking uses 25% less oil but lacks the deep fry's rich flavor.
What's the difference between Mumbai-style and Parsi-style bhaji?
Mumbai-style bhaji includes onions and often green chilies for extra heat, while Parsi-style versions use more herbs like parsley or cilantro and sometimes add nutmeg or cardamom for warmth. Both use chickpea flour, but Parsi bhaji may include peas or beans for texture. The spice level varies too—Parsi bhaji tends to be milder but more aromatic.